Guide to Writing a Simple GUI in PowerShell
A guide to writing a simple user interface using PowerShell. The guide contains explanations on a variety of forms and ways to build a user interface with buttons and fields.

Introduction:
Since a large portion of my articles are intended to teach beginners how to work with PowerShell, in order to provide background before I describe the simplest principles of writing a PowerShell GUI, I am adding an introduction here about the different ways PowerShell is used.
PowerShell is Microsoft’s scripting language, and it has tremendous power in data processing, performing operations, automation, and handling various Microsoft systems.
Most scripts are run from a regular PowerShell window, or PowerShell ISE. Some are run as scheduled tasks for automation purposes. But sometimes the use of a script is conditioned on several different factors, and the script writer wants to give the simple user the ability to choose between them and activate pieces of code in an easy way.
All of this brings us to the matter of the user interface - GUI.
Through the user interface it is possible to make tasks accessible for the simple user, who wouldn’t know how to edit the appropriate data in the code lines. From their perspective, everything appears clearly in front of their eyes, and they only need to click a certain button to perform an action, or enter short and simple input and click.
As mentioned, PowerShell is a scripting language. That is perhaps the highest tier among high-level languages. The lower a coding language is, the more detailed the code needs to be written. Because high-level languages contain more built-in libraries and methods designed to save the writer the details.
But generally speaking, lower-level languages work faster and make better use of computer resources. Scripting languages are more wasteful and their code demands more from the machine and runs more slowly.
Therefore although you can play a lot with GUI in PowerShell, it will almost always be in a fairly basic interface, and for running small, individual functions.
Below I will simply review the structure of the user interface that can be written in PowerShell, and the most important principles that need to be known and understood in order to create one.
It is important to remember that creating a user interface is one level above writing simple code, since the user interface is always intended to wrap code segments that run in response to input and buttons of the user interface.
User Interface Structure:
-
The code that determines the appearance and design of the interface.
-
The code that determines what will happen when each button in the interface is clicked.
We can see, therefore, that it is impossible to set the appearance and design of an interface without knowing how to write the code that will make it useful and active. The user interface alone is like a beautiful car body, without the chassis and engine.
Code Libraries:
Anyone who writes code knows that in any language you can write all the simple and regular operations. But when dealing with special functionality, there are dedicated code libraries for these needs that need to be imported.
PowerShell is no exception. The scripting language knows how to access various Windows components, pull objects and play with their properties. But for other uses you need to import special libraries called Modules.
Since PowerShell is built to work with Windows and Microsoft products, it has built-in support for C and .Net language libraries. These libraries can be imported at the beginning of the code, or called as part of the code.
To create a GUI, PowerShell uses various .Net libraries. I will mention two main ones here:
-
System.Windows.Forms - used for the simple shell of the interface and for creating controls.
-
System.Drawing - used for creating custom shapes, lines, circles, etc. But also for creating the shape of the interface and the grid of horizontal and vertical lines on which the objects belonging to the interface are positioned.
Message Box:
So, let’s start with the simplest form of user interface - a message box.
This can be done in three ways:
-
ComObject.
-
FormMessageBox.
-
Form.
ComObject - the simplest way. You create a script object and use the Popup method to pop up a message window.
The content of the message in the window can be entered as a string in quotes, or you can put a variable containing a string.
The Code:
$pop = New-Object -ComObject Wscript.Shel

$pop.Popup("!רוב שלומות") l
And here is the message:
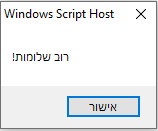 Simple window
FormMessageBox - the simplest way, it can be a single line.
A message window is created using a sub-library of Windows Forms, giving the command to display a message window, then entering two pieces of data in parentheses - the message content, and after it separated by a comma, the window title.
The Code:
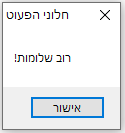
[System.Windows.Forms.MessageBox]::Show("!רוב שלומות" , "חלוני הפעוט")And this is what it looks like:
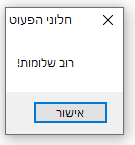 Window with message and OK button
But you can also display a more complex message.
We can enter a slightly more complex string into a variable, enclosed in at-signs and quotes as complex strings are enclosed in PowerShell.
In this way you can preserve spaces, line breaks, ignore complex characters and reserved symbols.
In short - in this form the entire string enters the variable as-is.
Important to remember, the at-signs and quotes before and after are placed on separate lines from the string content.
And here the string enters the variable as-is:
 $song = @"

,ואולי

.לא היו הדברים מעולם

,ואולי

,מעולם

,לא השכמתי עם שחר לגן

.לעבדו בזיעת אפי

"@
Then the command comes, displaying a window, giving the window a title and calling the variable to be its content:
[System.Windows.Forms.MessageBox]::Show($song , "כנרת")And this is what it looks like:
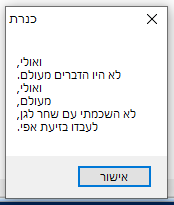 Message box
Form - Here we already arrive at the more complex form of a window, where you can add many things. But let’s start with a small message.
 $form = new-object Windows.Forms.Form

$form.Text = "חלוני הפעוט"

$text = New-Object System.Windows.Forms.TextBox

$text.Text = "!רוב שלומות"

$form.Controls.Add($text)

$form.ShowDialog()
And this is what it looks like:
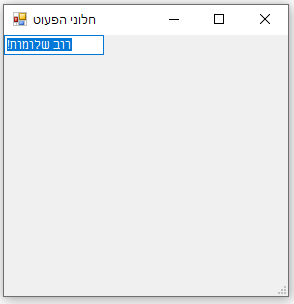 Form window
Yikes! What came out here! And it even takes 6 lines, when before we did it in a single line!
Indeed, this way is more complex, only because it presents more options.
Here we are not simply relying on a minimal command that just pops up a message. Here we are already creating objects, and we have a lot of options to decide how they will look and where they will sit.
Therefore it would be wasteful to use this option just for popping up a notification, but from here you can start building more complex things.
And if we are building it like this, we should take advantage of its capabilities - rather than letting it grow wild on its own.
Let’s go over the commands and understand what they did:
-
Creating a Windows Form object - which is essentially a user interface window.
-
Giving the window a title.
-
Creating a text box object inside the form window.
-
Entering a string into the text box.
-
Adding the text box to the form’s controls.
-
A command that displays the form as created so far.
Until now we defined almost nothing, so all the interface properties received default values. But if we learn how these objects are built, we can give them values that will arrange them in a more pleasing way.
Basic Elements in Defining a Windows Form Object:
The basic items that form part of every object in a Windows Form are as follows:
-
Size
-
Position
-
Text
Additionally, after defining an object, it needs to be added to the form.
At the end of the code, you need to call the method that displays the form. After the form and all its properties and behavior are defined, the method displays the form as configured.
The most basic properties of an object are size and position. These are usually measured in pixels.
It should be noted that although size is defined using the Drawing.Size sub-library, and position using Drawing.Point, if we define position using Drawing.Size as well, it will still work. Because ultimately using the library creates a double value of numbers. The double value can be entered as a size attribute as length and width, or as a position attribute as coordinate points.
An object can be defined in three lines.
For the sake of the example, we won’t use the values of the form itself, but of the text box we placed in the form earlier. That box was small and cramped, and pinned to the upper left corner.
Now we will define the size of the text box and its position in the form window:
 $form = new-object Windows.Forms.Form


$text = New-Object System.Windows.Forms.TextBox

$text.ClientSize = New-Object System.Drawing.Size(120,80)

$text.Location = New-Object System.Drawing.Point(75,30)


$text.Text = "!רוב שלומות"

$form.Controls.Add($text)

$form.ShowDialog()
And this is what it looks like:
 Window with centered line
It looks like in terms of position, the text box positioned itself as instructed - 75 points from the left, and 30 points from the top. Because position is always measured from the upper left corner.
But with size there is something strange - we set it to 120 points wide and 80 points tall. But it is the height of a single line.
Therefore we will need to add the following value to the code:
$text.Multiline = $true And this is what it will look like:
$text = New-Object System.Windows.Forms.TextBox
$text.ClientSize = New-Object System.Drawing.Size(120,80)
$text.Location = New-Object System.Drawing.Point(75,30)
$text.Multiline = $true
$text.Text = "!רוב שלומות"
$form.Controls.Add($text)
$form.ShowDialog()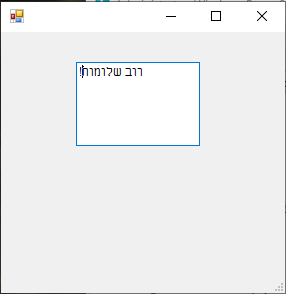 Multiline message window
But if we change the box type from a text box to a rich text box, we won’t need to mark it as multiline.
And also, until now we have seen how all the text aligned to the left. Even to display the exclamation mark in its correct place in the sentence, we had to put it reversed - at the beginning of the sentence.
Therefore in the following code we will add a line that tells it to flip the text box to the right-to-left direction.
And this is what it looks like:
$form = new-object Windows.Forms.Form
$text = New-Object System.Windows.Forms.RichTextBox
$text.ClientSize = New-Object System.Drawing.Size(120,80)
$text.Location = New-Object System.Drawing.Point(75,30)
$text.RightToLeft = [System.Windows.Forms.RightToLeft]::yes
$text.Text = "רוב שלומות!"
$form.Controls.Add($text)
$form.ShowDialog()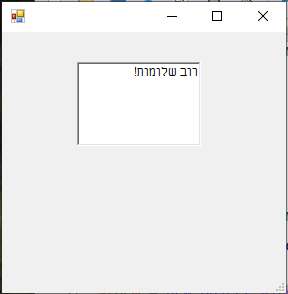 Rich text message window
Buttons:
Until now a window opened for us, and to close it we would click the X. Now let’s move to the next stage and learn how to create a button that will close the window.
This can be done in two ways:
-
Using the built-in “OK” and “Cancel” buttons available in Windows forms.
-
Creating a custom button and using a custom command that executes when the button is clicked.
Let’s start with the first option - using the built-in buttons:
To create an “OK” button, we will define a button according to what we learned earlier:
-
Creating an object.
-
Size.
-
Position.
-
Text that will appear on the object.
-
Adding the object to the form.
…wait… wait!
It’s not enough that the object is defined as a button. Behavior needs to be added to it.
Adding such behavior is done through the DialogResult property. This property accepts one of ten fixed values, and they are: Abort Cancel Continue Ignore No None Retry TryAgain OK.
You can see that there are some values here that perform similar operations, yet there are differences that we won’t dwell on.
For now we will use the OK button, and remember for simplicity that it is equally possible to also use, or place alongside it, the Cancel button. It depends on the content of the form and what you want to do.
And this is how you write the form definition with an OK button using DialogResult:
 $form = new-object Windows.Forms.Form


$text = New-Object System.Windows.Forms.RichTextBox

$text.ClientSize = New-Object System.Drawing.Size(120,80)

$text.Location = New-Object System.Drawing.Point(75,30)

$text.RightToLeft = [System.Windows.Forms.RightToLeft]::yes


$text.Text = "רוב שלומות!"


$okButton = New-Object System.Windows.Forms.Button

$okButton.Size = New-Object System.Drawing.Size(75,23)

$okButton.Location = New-Object System.Drawing.Point((($form.Width - $okButton.Width) / 2), (($form.ClientSize.Height - $okButton.Height) - 10))

$okButton.Text = 'OK'

$okButton.DialogResult = [System.Windows.Forms.DialogResult]::OK

$form.Controls.Add($okButton)

$form.Controls.Add($text)

$form.ShowDialog()
And this is what the result looks like:
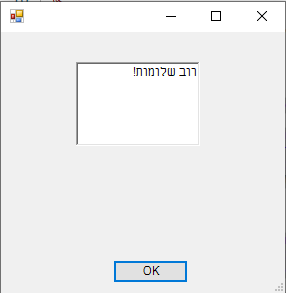 Dialog Result OK button
Position:
Now let’s focus on the way the button’s position was defined, and see that it is different from defining the text box’s position. Because we can define the position of an item in the form by itself, using absolute coordinates. But in many cases we will want to use coordinates that stand in relation to other items or to the size of the form.
In our example, we will always want the button to stand in the middle of the form. The size of the form can change, and therefore we can maintain the center position of the button using a simple formula:
Window width - button width / 2.
Relative position:
The position definition of an item is set according to the points where the item’s boundaries begin. Therefore if the item’s horizontal position starts at half the width, the item will start in the middle and extend to the right of it, according to the item’s size. Therefore when you want a true center, you need to calculate that the item will start a bit less than the center. How much less? Half the item’s size.
Now we see that defining the horizontal position of the item is different from defining its vertical position. While defining the item’s width simply accesses its width property, defining its height deals with a property called ClientSize. The difference between Size and ClientSize is the difference between gross and net.
Since the form’s border on the width side is very thin and barely adds to the overall width, there is almost no difference between the item’s width (expressed in the Size property) and the internal width (expressed in the ClientSize property).
But in height we have the window title. The window title together with the outer border define a gap of 39 pixels between the total height and the internal height.
These differences need to be remembered when setting a relative position in the height of a window, or when creating items with thick margins and styled borders. In such cases the difference between Size and ClientSize needs to be remembered and defined accordingly.
Form Items:
Every item that is defined needs to be added to the form.
Adding an item to the form is done in two ways:
- Individual addition - immediately after defining the item, a line is added that activates the Controls.Add() method on the form.
2. Bulk addition - at the end of the code that defines the form and all the items in it, before the last line that displays the form (using the Show.Dialog() method), all items are added to the form in one command. This is done through the Controls.AddRange() method.
Inside the parentheses of the method, an array of all the defined items to be added to the form is sent as a parameter.
Example of both code options:
 $form.Controls.Add($button

$form.Controls.AddRange(@($Label, $TextBox, $Button)) )
Custom Action Button:
While buttons like OK and Cancel can close a window or be limited to something along those lines, many times we will want to place buttons where clicking them will start a process or perform a specific action. An action that we determine.
For that there is the add_click method that defines an action for a button type item.
In the example before us we will define a button type item, and use the above method to perform an action:
 $form = new-object Windows.Forms.Form

$popButton = New-Object System.Windows.Forms.Button

$popButton.Size = New-Object System.Drawing.Size(75,23)

$popButton.Location = New-Object System.Drawing.Point((($form.Width - $popButton.Width) / 2), (($form.ClientSize.Height - $popButton.Height) - 10))

$popButton.Text = 'POP'

$popButton.add_click({[System.Windows.Forms.MessageBox]::Show("!רוב שלומות" , "חלוני הפעוט")})

$form.Controls.Add($popButton)

$form.ShowDialog()
When running the code the form appears with the button defined for it:
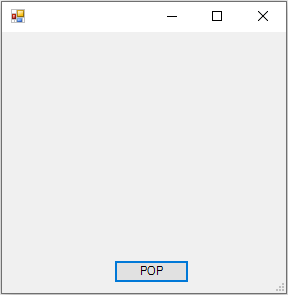 Button activating a method
And when clicking the button, a small message window pops up:
 Message window
From the code we see that after the button was created, the add_click method was used on it. Inside the parentheses that form the space where a parameter is sent to the method, a code block enclosed in curly brackets was placed.
In this way, when a button is clicked, the code inside the curly brackets will run.
Additional Options:
Here we placed the command we knew earlier, for popping up a message window. But equally you can insert complete functions inside the curly brackets.
Another way is to write code enclosed in curly brackets, and place it inside a variable. Then you can send the variable as a parameter to the add_click method, and it will work the same way.
For example:
 $do = {

    $winform.Close()

    $winform = 0

}


$form = new-object Windows.Forms.Form

$popButton = New-Object System.Windows.Forms.Button

$popButton.Size = New-Object System.Drawing.Size(75,23)

$popButton.Location = New-Object System.Drawing.Point((($form.Width - $popButton.Width) / 2), (($form.ClientSize.Height - $popButton.Height) - 10))

$popButton.Text = 'POP'

$popButton.add_click($do)

$form.Controls.Add($popButton)

$form.ShowDialog()
Explanation:
Running this code will pop up the same form as before. Except that clicking the POP button will close the form instead of popping up a message.
When creating forms through PowerShell it is important to remember to create a button that closes and disposes of the form.
Every time you create a form and play with it, you waste space in the memory area that PowerShell allocates for itself. When repeatedly creating forms without closing and disposing them and without releasing the space they occupy, PowerShell gets stuck and you need to close it through Task Manager.
Dividing Lines:
When creating a Windows Form and placing several items in it in an organized manner and wanting to create separations, it is advisable to place lines that delimit and separate certain areas in the window.
Steps for creating a line in a Windows Form:
-
Using the CreateGraphics method on the form, and receiving the result into a variable.
-
Creating a new Pen item, which in effect serves as the pen that draws the line (or any other shape that can be drawn using the same method, though using a different method).
-
Using the DrawLine method on the object from point 1. The method receives the following five parameters - the item serving as the pen drawing the line, two parameters representing coordinate points of the location where the line starts, and two more parameters representing coordinate points for the location where the line ends.
-
Using the add_paint method on the form, where the method receives the created line as a parameter.
The use of the add_paint method is done similarly to the add_click method. The add_paint method also receives as a parameter a code segment enclosed in curly brackets, or a variable in which that code segment enclosed in curly brackets is stored.
The curly brackets are essential. Inside them is placed the action performed in step 3.
Example code:
 $winform = new-object Windows.Forms.Form

$painter = $winform.createGraphics()

$pen = new-object Drawing.Pen black

$line = {$painter.DrawLine($pen, 30, 30, 250, 30)}

$winform.add_paint($line)

$winform.ShowDialog()
And this is what it looks like:
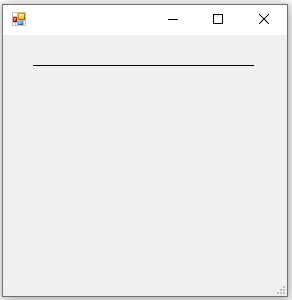 Dividing line
More on Windows Form Items:
Many and varied are the types of items that can be added to a Windows Form. Among them a clock, a browser window, a print preview and much more.
There are relatively simple items that have few properties and are fixed in their place. Such as a picture box or a label. There are items that can change according to input or output - like a text box or a checkbox.
And finally there are complex items that can be defined along with their options in many different ways.
Most of the items are simply defined according to the properties reviewed above - such as size, position and text. You can style the text or the item borders, set background or content colors, define item behavior when the mouse cursor passes over it, right-clicks, and much more.
Since the options are so numerous, a short and limited list of main items will appear here that will come into use in a simple user interface built by an IT person:
-
Label - a label. Essentially this is simple text that will appear in the form window.
-
Pen - simple shapes. Lines, circles, squares, etc.
-
TextBox - a text box. Can be used to receive input or to display output.
-
CheckBox - a checkbox. Actions can be performed according to the check in the box.
-
PictureBox - displays an image within a bounded area in the form.
-
Button - a button. Clicking the button will perform various actions according to its definition.
Summary:
These are the most basic options that are sufficient to create a simple user interface and activate processes through it.
There are many more options, but as mentioned - there is not enough space to elaborate. Anyone who knows how to define and write Windows Forms according to what was written here, will be able to expand their knowledge about additional items or advanced configurations of items not covered in this guide.